Seven-State Trend Score
Distill seven trend conditions into ranks 1 to 7, with dedicated colors revealing bullish and bearish extremes.
Indicator overview
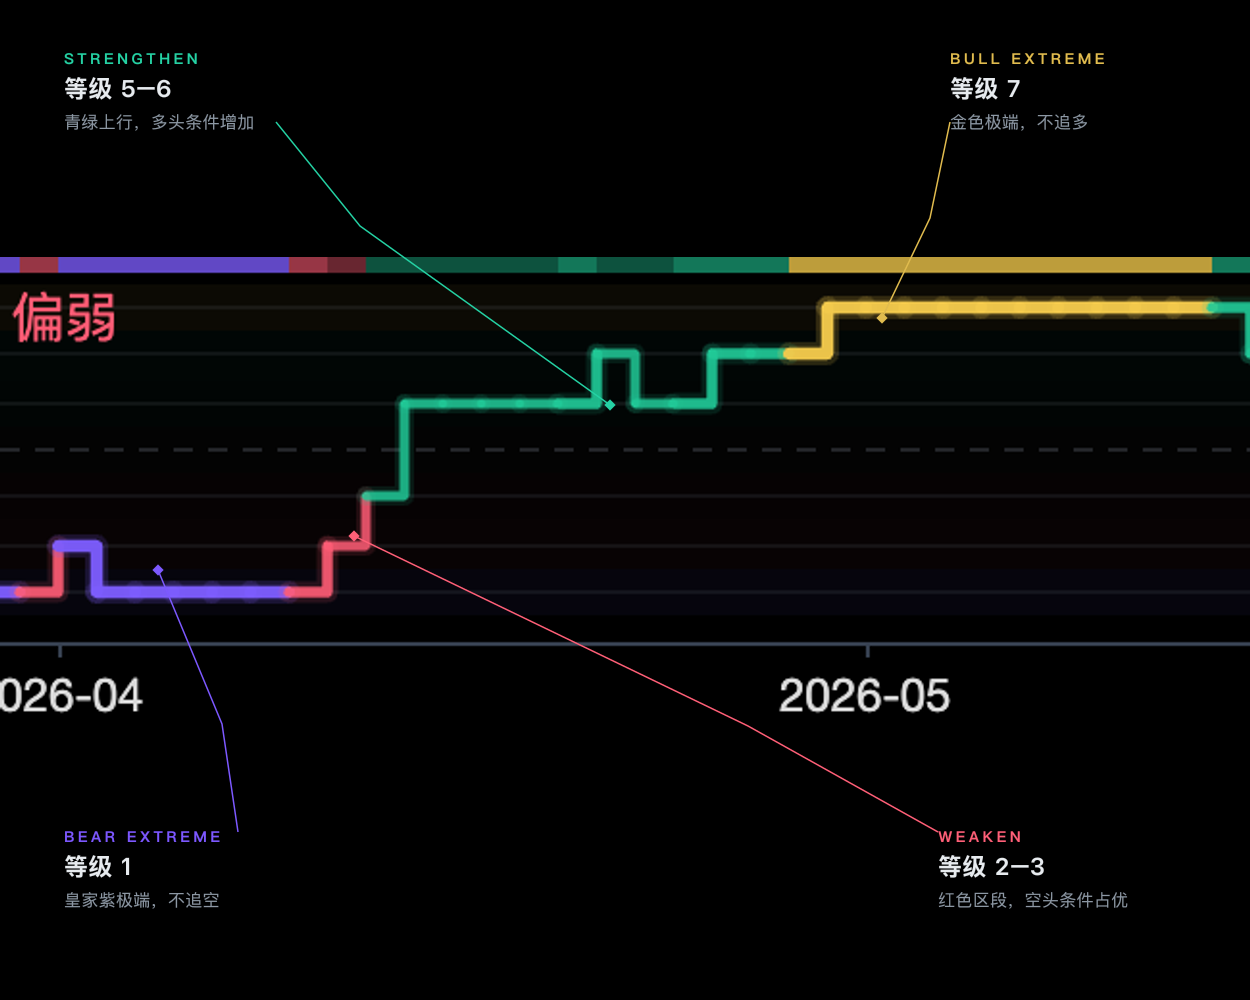
Use the 1-to-7 rank to understand the market state without watching several indicators at once. Rank 4 is balanced. Ranks 5-6 show growing bullish strength, ranks 2-3 show growing bearish strength, and ranks 7 and 1 mark bullish and bearish extremes.
It works best as a first filter: use the rank to decide whether to look for longs, shorts, or no trade, then use a specific signal for timing. A higher rank does not mean a higher probability of profit. Ranks 7 and 1 are reasons to avoid chasing an already extended move.
How to read the chart
- Layered bands and stepped line
- Seven fixed ranks stay distinct; the main line grows brighter and thicker away from neutral
- Teal / dark-red segments
- Above 4 is strengthening and below 4 is weakening
- Gold extreme band
- Reserved for the rank-7 bullish extreme and distinct from normal bullish green
- Royal-violet extreme band
- Reserved for the rank-1 bearish extreme and distinct from normal bearish red
- Top state rail
- Shows per-bar state strength while stepped corners remain clean and dot-free
- Independent extreme badges
- Rank 7 uses gold and rank 1 uses royal violet with no shared warning color
Signal confirmation
State strengthening
Rank rises from 4 toward 5 and 6 as bullish agreement increases
Extreme warning
Rank enters 7 or 1; wait for it to leave the extreme before confirming a turn
Further viewing
Watch on YouTubeThis video is for feature guidance only. Use the output and parameters shown on this page as the source of truth.
How to use it
- 01
Use ranks 5 to 6 as trend context and another structure signal for exact entry timing
- 02
Do not chase longs at rank 7 or shorts at rank 1; wait for price and rank to leave the extreme
- 03
Treat a drop from rank 7 as weakening only after price also breaks relevant structure
- 04
Use PB7 separately when you need trend-agreement brightness rather than rank location
Events where one gap, volume anomaly, or data discontinuity contaminates all correlated inputs at once.
Parameter guide
Center state where bullish and bearish conditions are balanced
Bullish strengthening and bearish strengthening respectively
Potential bullish and bearish overextension respectively
For technical-analysis education only, not investment advice. Use independent judgment and risk controls.